
Zimbra is a great alternative to Microsoft Exchange.
Here we will show you how to quickly add a mail filter using Zimbra webmail so that any further emails from a specific email address will go automatically into your chosen email subfolder to assist in your mailbox management.
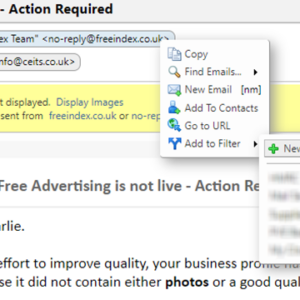
To begin, just find an email, and right click on the sender’s email address. You’ll see the dropdown has the option ‘Add to Filter’, hover over this and select ‘New Filter.
Now, choose an appropriate Filter Name, and choose ‘Move into folder’, then click ‘Browse’. You will notice the top window has already been prefilled. For our requirements, we can leave this as is.
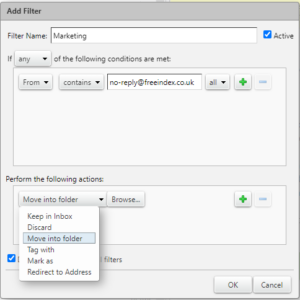
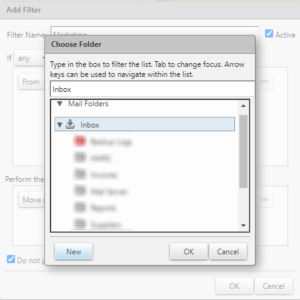
Here is where you can choose an existing folder, however we’ll be creating a new one called ‘marketing’ so just click the button ‘New’ in the bottom left corner of the window.
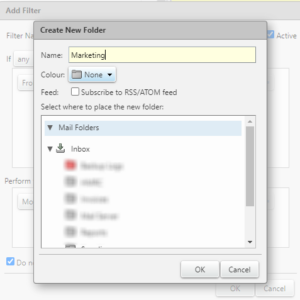
As mentioned, we’re creating a new folder and calling it ‘marketing’ so this window is pretty self explanatory!
And that’s it, click OK and you’ve created a filter which means that any new mail from that sender will go straight into your new folder. However, you’ll notice that your new folder is empty – the filter doesn’t run automatically on new items and so we’ll do that now!
Click, Preferences in the menu at the top of the screen and then choose ‘Filters’ from the sub menu on the left. Click on your new filter under ‘Active Filters’ and choose run Filter.
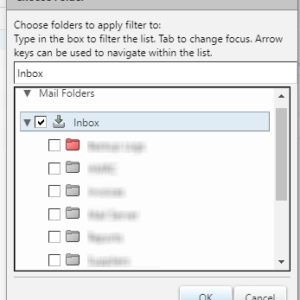
Now you’re asked which folder you want to apply your filter to – make sure you have the first ‘Inbox’ folder checked and click OK.
That’s it! Yet another thing made nice and easy with Zimbra.